JS를 이용한 것과 비슷하게 React를 사용해 댓글 기능을 렌더, 생성, 수정, 삭제 순으로 구현해보자.
1. Set up
곱셈 때와 마찬가지로, 댓글다는 기능을 가진 컴포넌트를
크게 몇 개의 하위 컴포넌트로 쪼개 구성할지를 가장 먼저 생각해봐야한다.
이번에도 댓글 내용을 쓰고 submit할 부분 (이하 commentForm),
이미 작성된 댓글들을 불러와 렌더링해주는 부분 (이하 commentList)
이렇게 2개 파츠로 컴포넌트를 구성해 코드를 작성할 것이다.
우선 component 폴더 안에 comment 폴더를 만들고 comment.jsx 파일을 만든다.
/*  practice/src/component/comment/Comment.jsx  */

import React from 'react'

class Comment extends React.Component {
   render() {
      return (
         <ul className = 'comment'>
            Hello comment
         </ul>
      )
   }
}

extend default Comment
className은 나중에 css로 스타일링을 할 때 사용하기 위해 미리 적어둔다.
이 컴포넌트를 App.jsx로 가져온다.
/*  practice/src/App.jsx  */

import React from 'react'

import Comment from './component/comment/comment.jsx'

class App extends React.Component {
   render() {
      return(
         <>
            <Comment/>
         </>
      )
   }
}

export default App
Hello comment 문구가 출력되면 잘 import 된 것이다.

그런데 이번에는 App 컴포넌트 안에 comment 컴포넌트를 넣을 때 self-closing 형태로 만들지 말고,
commentForm, CommentList 컴포넌트 모두 App 컴포넌트에 가져와 <Comment> 컴포넌트에 넣어보자.
그리고 이렇게 넣어준 child 컴포넌트들 또한 변수나 value와 같이 props로 전달해줄 것이다.
(CommentFrom, CommentList는 아직 안 만듬)
/*  practice/src/App.jsx  */

import React from 'react'

import Comment from './component/comment/Comment.jsx'
import CommentForm from './component/comment/CommentForm.jsx'
import CommentList from './component/comment/CommentList.jsx'

class App extneds React.Component {
   render() {
      return(
         <>
            <Comment>
               <CommentForm/>
               <CommentList/>
            </Comment>
         </>
      )
   }
}

export default App
이제 이렇게 App 컴포넌트에서 준 child들을 Comment 컴포넌트에서 다음과 같이 받는다.
/*  practice/src/component/comment/Comment.jsx  */

import React from 'react'

class Comment extends React.Component
   render() {
      return (
         <ul className = 'comment'>
            {this.props.children}
         </ul>
      )
   }
}

export default Comment
이제 CommentForm.jsx, CommnetList.jsx를 작성하자.
/*  practice/src/component/comment/CommentForm.jsx  */

import React from 'react'

class CommentForm extends React.Compoent {
   render() {
      return (
         <li className='comment-form'>
            <form>
               <span className='ps-box'>
                  <input type='text' className='int' placeholder='write comment'/>
               </span>
               <input type='submit' className='btn' value='submit' />
            </form>
         </li>
      )
   }
}

export default CommentForm
/* practice/src/component/comment/CommentList.jsx */
import React from 'react'
class CommentList extends React.Component {
render() {
return(
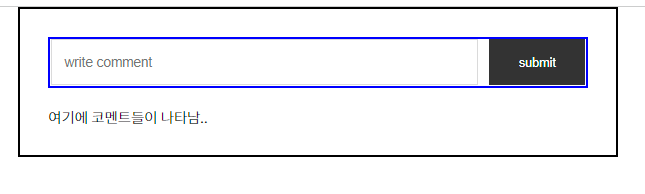
<li>
여기에 코멘트들을 렌더링 함..
</li>
)
}
}
export default CommentList
마지막으로 스타일링을 한 후, 브라우저에서 불러와본 후 다음 단계로 넘어가자.
/*  practice/src/assets/comment.css  */

*{margin:0; padding:0;}
body{
    font-family: 'Noto Sans KR', sans-serif;
    font-weight:300;
}
ul,li{
    list-style:none;
}

.comment{
    display:flex;
    flex-direction: column;
    flex-wrap: nowrap;
    padding:30px;
    width:600px;
    margin:0 auto;
    border: 3px solid #000;

}

.comment > li{ margin-top:20px; }
.comment > li:nth-child(1){ margin:0px;}

.comment-row{
    display:flex;
    justify-content: space-between;
    flex-direction: row;
}

.comment-row{
    margin-top:20px;
    width:100%;
}

.comment-row > li:nth-child(2){
    flex-shrink: 0;
    flex-grow: 1;
    padding-left:25px;
    z-index:1;
    width:100%;
}

.comment-row > li:nth-child(2){
    width:85px;
}

.comment-form {
    border: 3px solid blue;
}

.comment-form > form{
    display:flex;
    flex-direction: row;
    flex-wrap: wrap;
    justify-content: space-between;
}

.comment-form > form > h4{
    width:100%;
    margin:14px 0 14px 0;
}

.comment-content{
    word-break:break-all;
    padding-right:25px;
}

.ps_box{
    display: block;
    position: relative;
    width: 80%;
    height: 51px;
    border: solid 1px #dadada;
    padding: 10px 14px 10px 14px;
    background: #fff;
    box-sizing: border-box;
}

.ps_box > input{
    outline:none;
}

.int{
    display: block;
    position: relative;
    width: 100%;
    height: 29px;
    padding-right: 25px;
    line-height: 29px;
    border: none;
    background: #fff;
    font-size: 15px;
    box-sizing: border-box;
    z-index: 10;
}

.btn{
    width:18%;
    padding: 18px 0 16px;
    text-align: center;
    box-sizing: border-box;
    text-decoration: none;
    border:none;
    background:#333;
    color:#fff;
    font-size:14px;
}

.comment-delete-btn{
    display:inline-block;
    margin-left:7px;
    cursor: pointer;
}

.comment-update-input{
    border:none;
    border-bottom: 1px solid #333;
    font-size:16px;
    color:#666;
    outline: none;
}
2. 댓글 렌더링하기
데이터베이스에서 댓글 정보를 가져왔다고 가정하고, App 컴포넌트 안에 이를 가져와 CommentList로 전달하자.
JS에서는 이럴 때 html 요소를 전부 불러온 직후 바로 데이터를 넣어줄 수 있도록
DOMContentLoaded 이벤트를 감지해 동작하는 addEventListener를 script에 추가했었다.
이 DOMContentLoaded에 대응하는 것이 componentDidMount 함수이다.
말 그대로 컴포넌트가 마운트되면 실행되는 함수라고 생각하면 된다.
처음 App 컴포넌트에서 state에 빈 배열을 하나 만들어놓고,
componentDidMount 함수 실행시, 이 리스트를 댓글 데이터를 담은 객체로 바꿔주면 된다.
/*  practice/src/App.jsx  */

class App extends React.Component {
   state = {
      list: []
   }

   componentDidMount() {
      this.setState({
         ...this.state,
         list: [
            {userid: 'qwerty1', content:'hello111111', date:'2022-04-24'},
            {userid: 'qwerty2', content:'hello222222', date:'2022-04-24'},
            {userid: 'qwerty3', content:'hello333333', date:'2022-04-24'}
            // 이런 댓글 데이터를 가져왔다고 가정..
         ]
      })

   render() {
      const {list} = this.state
      return(
         <>
            <Comment>
               <CommentForm/>
               <CommentList list={this.state.list}/>
            </Comment>
         </>
      )
   }
}
이렇게 만든 App 컴포넌트의 state.list를 CommentList로 전달한다.
/*  practice/src/component/comment/CommentList.jsx  */

class CommentList extends React.Component {
   items = () => this.props.list.map((v,k) => {
      return (
         <ul className='comment-row' key={k}>
            <li className='comment-id'>{v.userid}</li>
            <li className='comment-content'>{v.content}</li>
            <li className='comment-date'>{v.date}</li>
         </ul>
      )
   })

   render() {
      return(
         <li>
            {this.items()}
         </li>
      )
   }
}
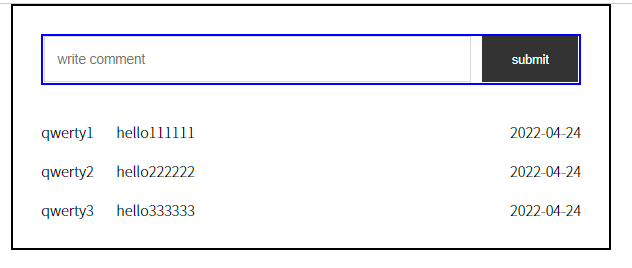
CommentList 컴포넌트에서는 App 컴포넌트에서 전송한 list 배열을 map 메소드를 사용해
list 배열의 각 객체의 요소들을 li element에 하나씩 넣어준다.
그 후, render 함수 내에서 items 함수를 호출하면 댓글 데이터가 렌더링된다.
3. 댓글 쓰기
이제 댓글을 쓰는 기능을 구현해보자.
App 컴포넌트에서 submit시 발동하는 함수를 선언한 후, 이를 CommentForm 컴포넌트에 전달할 것이다.
/*  practice/src/App.jsx  */

class App extends Component {
   state = {
      list:[]
   }

   componentDidMont() {
      //...중략
   }

   addList = (content) => {
      this.setState({
         list:[...this.state.list, { userid:'qwerty4', content: content. date:'2022-04-24'}]
      })
   }

   render() {
      return(
          <>
            <Comment>
               <CommentForm
               onSubmit = { (content) => { this.addList(content) } }
               />
               <CommentList list={this.state.list}/>
            </Comment>
         </>
      )
   }
}
댓글을 새로 써서 submit할 때 특별한 이유가 없는 이상 userid와 date는 상수일테니 고정값을 아무거나 적어두면 되고
늘 달라질 댓글 내용 content만을 변수로 받아 setState 함수로 추가해주면 된다.
이 addList 함수를 CommentForm에 전달한다.
이 함수만 딱 전달해서 다 해결되면 참 좋겠지만 아니다.
CommentForm의 state도 타이핑을 할 때마다 계속 업데이트 해줘야 쓴 내용을 전달할 수 있고,
submit 할때마다 댓글 input을 다시 빈칸으로 바꿔주는 작업도 필요하다.
우선 전달받은 함수를 포함하고, 거기에 몇 가지 기능을 더 얹은 함수를 CommentForm에 선언해주어야 한다.
/*  practice/src/component/comment/CommentForm.jsx  */

class CommentForm extends React.Component {

   state = {
      value:''
   }

   handleSubmit = (e) => {
      e.preventDefault()
      this.props.onSubmit(this.state.value)
      // App 컴포넌트에서 받은 함수 (addList)
      this.setState({
         value:''
      })
   }

   render() {
      return(
         <li className='comment-form'>
            <form onSubmit = {this.handleSubmit}>
               <span className='ps_box'>
                  <input type='text' className='int' placeholder='write comment'/>
               </span>
               <input type='submit' className='btn' value='submit'/>
            </form>
         </li>
      )
   }
}
App 컴포넌트에서 상속받은 addList함수의 실행을 포함한 새로운 함수 handleSubmit을 선언했다.
이 handleSubmit 함수 안에는 preventDefault를 시작으로 addList에 매개변수를 전달하고,
다시 state를 초기화하는 기능이 있다.
이걸 form element에 넣어준다.
그런데 이렇게 하고 submit을 눌러도 빈 댓글만이 생성된다.
이는 handleSubmit안에서 실행되는 addList 함수가 this.state.value를 가져다 추가를 해야하는데,
CommentForm의 state.value값이 변하지 않았기 때문이다.
계속 타자를 쳐서 input box가 채워져도 input의 value가 변하는거지, state.value값이 변하지 않는다는 말이다.
그래서 우리가 타이핑을 할 때마다 그 변화를 인지해서 state.value값을 바꿔줄 하나의 함수가 더 필요하다.
다음과 같이 CommentForm에 함수를 하나 더 추가한다.
/*  practice/src/component/comment/CommentForm.jsx  */

handleChange = (e) => {
   this.setState({
      value:e.target.value
   })
}
이 함수를 input에 넣어준다.
/*  practice/src/component/comment/App.jsx  */

<form onSubmit = {this.handleSubmit}>
   <span className='ps_box'>>
      <input type='text' className='int' placeholder='write comment'
      onChange = {this.handleChange}
      value = {this.state.value}
   </span>
   <input type='submit' className='btn' value='submit />
</form>
우리가 input 박스안에 뭔가 타이핑을 하면 handleChange 함수가 발동한다.
이 함수는 state.value를 e.target의, 즉 input 박스의 value로 바꿔준다.
input 박스의 value도 {this.state.value}로 변경된다.
이제 submit을 누르면 내가 타이핑한 내용이 그대로 댓글 리스트에 추가되는 것을 확인할 수 있을 것이다.
여기까지 하고 다음 글에서는 글의 수정과 삭제 기능을 구현해보자.
'React' 카테고리의 다른 글
| #10 함수형 컴포넌트 1. intro, useState (0) | 2022.04.29 |
|---|---|
| #9 댓글 기능 만들기 part2 (0) | 2022.04.24 |
| #7 곱셈 프로그램 만들기 (0) | 2022.04.24 |
| #6 Styling (0) | 2022.04.22 |
| #5 Webpack (0) | 2022.04.22 |